

Last Updated: November 5, 2026
Quick Summary
SxS wheel spacers widen track width and create tire clearance, which many riders want for stance and stability. They also add stress to wheel bearings, axles and steering, so weigh those costs and confirm fitment for your exact machine before buying.
- Spacer thickness sets the track-width change, so check track width first.
- Confirm bolt pattern, hub bore, offset and stud length for your exact model.
- Re-torque after the first ride and again at each tire rotation.
- Spacers add load to wheel bearings, axles and suspension, so inspect them regularly.
- Check warranty, local trail rules and insurance before you order.
Table of Contents
- What SxS Wheel Spacers Do and How They Change Track Width
- The Pros of Wheel Spacers: Stability, Stance and Tire Clearance
- The Cons of Wheel Spacers: Bearing, Axle and Steering Effects
- ATV and UTV Wheel Spacer Sizing and Model-by-Model Fitment
- SxS Wheel Spacer Installation, Torque and Post-Install Checks
- Wheel Spacers vs. Offset Wheels: Which Fits Your Riding
- Warranty, Legality and Insurance Before You Buy Spacers
- Choosing Your Setup and Getting Fitment Confirmed Before You Order
- Frequently Asked Questions
Wheel spacers are one of the most common upgrades for side-by-side owners who want a wider stance and better tire clearance. They can also change how the vehicle steers, how the wheel bearings wear, and how safe the setup is on the trail.
Our goal is to give you the practical trade-offs, not a sales pitch. Wheel spacers are a useful tool in the right setup, but they are not the right answer for every rider or every machine.
What SxS Wheel Spacers Do and How They Change Track Width
A wheel spacer is a machined spacer that bolts between the hub and the wheel, pushing the wheel outward. This increases the track width, which is the distance between the left and right wheels.
The effect depends on spacer thickness. A thin spacer adds a small amount of width. A thick spacer can change the stance noticeably, which is why sizing matters so much. Track width is the number to check first when you compare options.
The Pros of Wheel Spacers: Stability, Stance and Tire Clearance
Wheel spacers are popular for three main reasons. Each one has a real benefit, but the size of that benefit depends on the setup.
- Wider stance. A wider track sits lower and wider on the ground, which many riders find more planted on side slopes.
- Potential stability gains. Extra width can make the vehicle feel more stable at speed on uneven terrain.
- Tire clearance. Spacers create room for larger tires or a square tire setup without rubbing the fenders or suspension.
Watch out: A wider track is not automatically safer. Stability depends on tires, suspension setup, load and how you ride, so test any change carefully.
The Cons of Wheel Spacers: Bearing, Axle and Steering Effects
Spacers also add use and load to parts the factory never designed for that position. These are the drawbacks riders most often overlook.
- Added wheel bearing stress. Moving the wheel outward changes the load on the bearings, which can speed up wear over time.
- Added axle and suspension stress. Extra use places more force on axles, ball joints and other suspension components.
- Changed steering feel. Steering effort and feedback can change, especially at low speed.
- Rollover risk in some setups. A wider track does not remove rollover risk, and a poor setup can make a machine behave less predictably.
Check your bearings, axles and steering components regularly if you run spacers. Wear shows up gradually, so a routine inspection is the best early warning.
The drawbacks riders most often overlook are summarised below.
| Drawback | Affected part | Effect |
|---|---|---|
| Added wheel bearing stress | Wheel bearings | Can speed up wear over time |
| Added axle and suspension stress | Axles, ball joints, suspension | Extra force on components not designed for that position |
| Changed steering feel | Steering | Effort and feedback can change, especially at low speed |
| Rollover risk in some setups | Vehicle handling | Wider track does not remove risk; poor setup behaves less predictably |
ATV and UTV Wheel Spacer Sizing and Model-by-Model Fitment
Sizing is where most problems start. Fitment depends on your vehicle's bolt pattern, hub bore, wheel offset and the wheel you plan to run. A spacer that fits one model may not fit another, even within the same brand, so treat the spec sheet for your exact machine as the starting point rather than a generic UTV chart.
Start with the four fitment numbers
Before you order, confirm these details for your specific side-by-side:
- Bolt pattern. Bolt patterns vary by model, but pattern alone does not confirm fitment. Count the studs and measure the bolt circle rather than assuming.
- Hub bore and centre bore. The spacer's centre bore must clear the hub pilot. A spacer with a larger bore can be adapted with hub-centric rings; a smaller bore will not seat flush.
- Wheel offset and rim width. A spacer adds to the effective offset. If your wheel already sits close to the fender or suspension, a thick spacer can push the tire into contact at full compression.
- Tire size and clearance at full travel. Measure clearance with the suspension cycled, not at ride height. A tire that clears in the driveway can rub on the trail.
What common spacer widths actually change
Spacer thickness translates into track-width change, typically a gain of twice the spacer thickness across the vehicle because the spacer adds to each side.
Clearance gains follow the same logic.
Riders who tow often keep total width within the trailer deck and any trail-system width rule that applies where they ride.
Watch out: Bolt pattern matching is only the first check.
Model-specific limits to verify
Some manufacturers publish a maximum recommended track-width increase or restrict spacers in certain applications. Check your owner's manual and any warranty language for your model before ordering, and confirm stud length: if the spacer does not include pressed-in studs, you will need longer wheel studs or a stud conversion, and the lug nuts must engage enough threads to be safe. When in doubt, measure the stud protrusion past the wheel face and compare it to the lug nut's thread depth.
SxS Wheel Spacer Installation, Torque and Post-Install Checks
Proper installation matters as much as choosing the right spacer. A poorly installed spacer can loosen, damage studs or create a wheel-off condition on the trail. The procedure below is a common installation sequence; torque values come from your vehicle and spacer manufacturer, not from a generic chart.
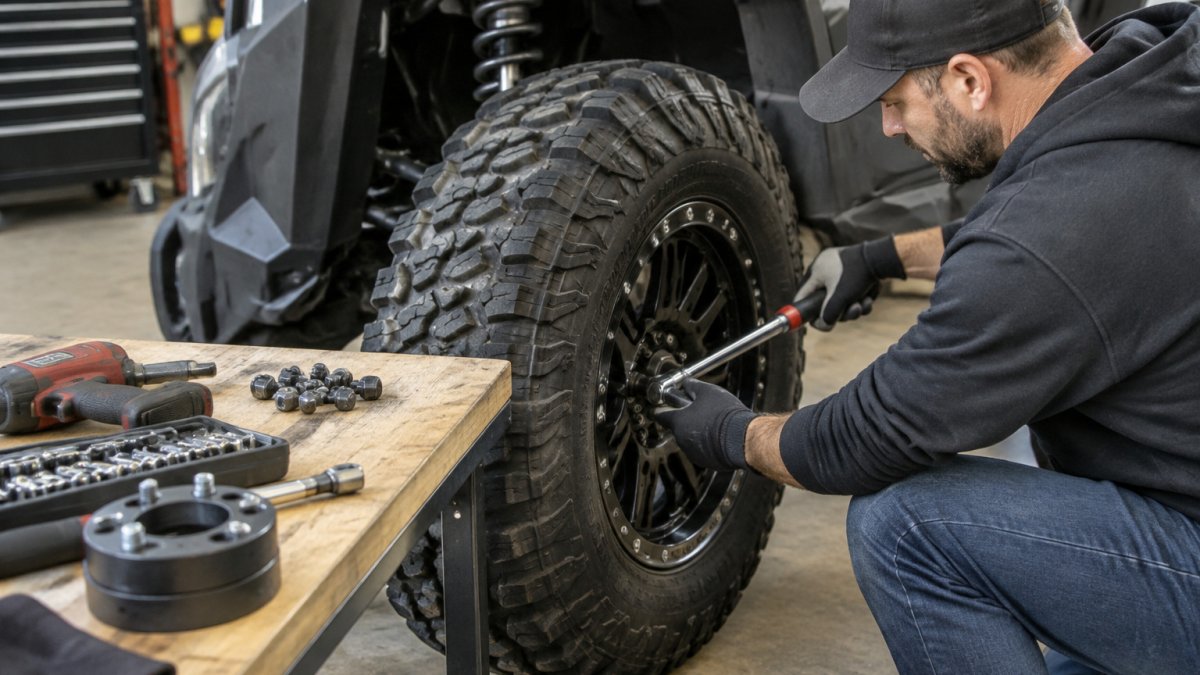
Before you start
- Confirm the spacer is the correct pattern, bore and thickness for your machine, and that the studs or lug nuts supplied match your wheels.
- Clean the hub face, the spacer faces and the wheel mounting surface with a wire brush and brake cleaner so no dirt, rust or old threadlocker sits between them.
- Check stud condition. Replace any stud with stretched threads, corrosion or a damaged shoulder before installing.
Installation sequence
- Dry-fit the spacer. Slide it onto the hub and confirm it sits flush with no gap and no interference with the brake rotor or dust shield.
- Confirm thread engagement. With the wheel mounted, check that the lug nuts engage enough threads. As a rule of thumb, engagement should equal at least the stud diameter; if it does not, you need longer studs or a different spacer design.
- Torque in stages. Tighten the lug nuts in a star pattern to the torque specification published by your vehicle manufacturer or the spacer maker, whichever applies to the fastener you are using. Tighten in two or three stages rather than all at once.
- Re-torque after the first ride. Re-check torque after the first short ride and again after the first few hours of use, then at each tire rotation. Spacers are a clamped joint, and clamp load can relax as parts seat.
- Inspect for rub and hardware movement. Look for witness marks on fenders, control arms and brake lines, and check that no lug nut has backed off.
Post-install inspection checklist
- Re-check torque at the interval your manual or spacer maker specifies, and at every tire rotation thereafter.
- Inspect studs for stretch, cracking or thread damage at each re-torque.
- Look for uneven tire wear, which can signal a seating or alignment issue.
- Listen for new noises at low speed and check for vibration at highway speed.
- Re-check brake line and ABS sensor routing for rubbing at full steering lock and full suspension travel.
Watch out: Do not substitute an impact gun for a torque wrench on the final pass. Over-torquing stretches studs and can crack a spacer; under-torquing lets the joint work loose. Use the torque wrench for the final stage every time.
What to record
Keep a simple log of install date, spacer thickness, torque values used and re-torque dates. If you ever sell the machine or file a warranty or insurance claim, that record shows the modification was installed and maintained to spec.
Wheel Spacers vs. Offset Wheels: Which Fits Your Riding
Spacers are not the only way to widen a stance. Offset wheels change where the wheel sits relative to the hub, so they can achieve a similar track width without adding a separate part between hub and wheel.
- Spacers are often cheaper and easier to swap between wheels, but they add use on the hub and bearings.
- Offset wheels keep the load path closer to factory design, but you need the right offset for your machine and your wheel choice.
For a riding style that is mostly casual trail use, a modest offset change may be enough. For heavy trail or utility work, many riders prefer a setup that keeps loads closer to stock. Think about how you ride before choosing.
Warranty, Legality and Insurance Before You Buy Spacers
Modifications can affect more than performance. Before you install spacers, check the following:
- Warranty. Some manufacturers may deny claims tied to aftermarket changes, especially drivetrain or suspension damage.
- Legality. Rules on vehicle width, modifications and use on public land or trails vary by province and by trail system. Check the rules that apply where you ride.
- Insurance. Some insurers require you to declare modifications. An undeclared change could affect a claim.
We recommend checking your warranty terms, your local trail rules and your insurance policy before you order. A quick call can prevent an expensive surprise later.
Choosing Your Setup and Getting Fitment Confirmed Before You Order
The right setup depends on your machine, your riding and your tolerance for added load. Start by confirming fitment for your exact model, then decide whether spacers or offset wheels better match how you ride.
Our detailed fitment guide for SxS rims covers sizing and bolt patterns so you can confirm the details before you buy. If you are unsure which spacer thickness or wheel offset suits your Can-Am, Polaris or other machine, check the fitment details against your vehicle's specifications first.
Frequently Asked Questions
What are the benefits of wheel spacers on a SxS?
Wheel spacers push the wheel and tire outward, which widens the track width and gives the vehicle a wider stance. A wider stance can improve side-to-side stability on uneven terrain and in side slopes, and it creates room for larger tires or a square tire setup without rubbing. The gain depends on the spacer width and the vehicle, so measure your current track width and confirm clearance before buying. Spacers do not change the engine, gearing or suspension geometry, so they are a fit and stance change rather than a performance upgrade.
Do wheel spacers cause extra wear on SxS wheel bearings?
They can. Moving the wheel outward increases the leverage on the wheel bearings and hub, which raises the load each bearing carries, especially in corners and on rough terrain. Thicker spacers and heavier tires increase that load. Check bearing play and listen for noise at regular intervals after installing spacers, and replace bearings on the normal service schedule. Choosing the thinnest spacer that gives you the clearance you need limits the added stress.
How do I choose the right wheel spacer size for my SxS?
Start with the clearance problem you are solving. Measure how much room you have between the tire and the fender, control arm or frame at full steering lock and full suspension compression. Then choose the thinnest spacer that clears those points with some margin. Confirm the spacer's bolt pattern, hub bore and stud length match your vehicle, since the studs must still engage the lug nuts fully. Spacers that are too thick for the studs are a common and unsafe mistake.
Are SxS wheel spacers safe when installed correctly?
Spacers are generally safe when they are sized correctly, use hub-centric or properly matched hardware, and are torqued to the manufacturer's specification. The main safety risks come from stud engagement that is too short, lug nuts that loosen over time, and added load on bearings and axle components. Re-torque the lug nuts after the first short ride and again after several hours of use, and inspect the spacers and studs at each oil change or service interval.
